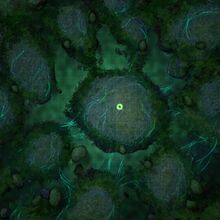
How To Access: Map 15: Edge of the World (6,7)
Tips[]
Key Points[]
- (6,23) Tower: Gnoll, Open the Horcrux (STR 1100)Drop Surveillant's Eye
- (3,7) Tower: Corrupted Walker, Evil Eye, Enraged Wraith, Open the Horcrux (MAG 1100)Drop Surveillant's Eye
- (29,5)Tower:STR Check 1000, Enraged Wraith, Nameless Mage+2 Enr. Wraiths, Drop Surveillant's Eye
- (26,27) Tower: Dark Moon Servants, Open the Horcrux (Dex 1100)Drop Surveillant's Eye
- (18,16) Destiny Altar: Inferior Lemure, Superior Lemur, Put Surveillant's Eye 4/4
Epilogue: Make sure to turn in the eyes from a clean max/food adventure(Min:2500 food) From the moment you click on the epilogue you will appear in a new version of the abyss in which you have 5 minutes to do all the bellow locations. You will need minimum 2500 Food to reach all the location the first time and an additional 400 for the second try(so plan ahead to get it right the first time). Realistically speaking you will unlikely succeed the first time as the devs decided to put random mobs in the way that you can not go around. So not only that you need a huge push of luck on hits landing, crits and weapon procs... You also need the perfect layout that allow you to go around all the mobs.
In the video bellow after the 3rd towers(Bottom Left) you can check over the 5th tower(Bottom Right)... If no mobs in the way next to the portal it would be quicker to do that tower first then reuse the portal out to finish with the top right tower instead of going all around as there might possibly be mobs there blocking you. You basically can not afford to fight any extra mobs on the map beside the 5 towers. It might still be possible after one extra fight depending how fast you will be with the towers but definitely not two.
- Dark Moon 5 Towers Team (w/ Blood Mage and gold bag by Goodurden)
- Dark Moon 5 Towers Team (w/ Blazing Gun by Maycoanhsang)
- Dark Moon 5 Towers Race (by Goodurden)
- Dark Moon 5 Towers Race (by Devil)
Sugested Team:
1-Blood Mage, Berserker God, Pope, Chaplain Knight
- (11,3) Spectral Hill: Superior Lemur
- (4,10) Howling Lair: Superior Lemur
- (6,23) Silent Ruins: Superior Lemur
- (30,4) Witherwood Forest: Superior Lemur
- (26,27) Weeping Valley: Superior Lemur
2- Berserker God, Berserker God, Blood Mage, Priest
Same route as above. The extra Barbarian means food requirements are easier to meet and the damage output is plenty to complete in the timeframe, with time to camp and rest a couple of times.
Boss: Dark Moon God Skills
- Vids: Team
- Dark Moon Priest (by @Chem#3751)
- Dark Moon Lady (by @Chem#3751)
- Dark Moon God v.1 (by @Chem#3751)
- Dark Moon God v.2 (by @Chem#3751)
Dungeondeadbeat's Guide to the Dark Moon God (pre red gears):
Persephone's Guide to the Dark Moon God:
Pro Tips: once you have more powerful gear and a higher forge level, you can sub in a High Witch Doctor instead of a Soul Sage since the magic down on P1 is no longer necessary. You should have enough damage to take the boss 100-0% in under 1:30 minutes. Set your HWD to the plague attack for even more damage. The stronger & longer HoT will help on P3.
More Pro Tips for temple runs - use the red hammer on your priest and give her the lunar greaves. Do not try a mage w/ immolator staff instead of a barb god, P3 will be faster but you will likely fail the dps timer on P4. And the most important tip of all... Do not run Dark Moon God in the temple back to back. Return to sanctuary after each win or you will lose all your staves if you die.
Points of interest:
- Monument(11,3)
(OPT)Quests:[]
- Assemble all the Eyes of the Observer
- Ancient Elvish Language-Expert
- Seal the Daughter of Dark Moon
Monsters encounters:[]
- Corrupted Walker: Erosive Paw Strike, Immune to Plague
- Dark Moon Servants: Power Transfer, Soil Acidification, Meteor Falls
- Enraged Wraith: Self-burning Flame, Immune to all Debuffs
- Evil Eye: Withering Beam
- Inferior Lemure: Ravage, Meteor Falls, Cannot be Stunned ~ drop: loot Lemure Nail
- Nameless Mage: Giant Fireballs, Freezing Storm, Tranquility
- Superior Lemure: Endless Ravage, Meteor Falls, Cannot be Stunned
- Wraith: Scream, Immune to all Debuffs
- Gnoll: Sand Strike
Loots:[]
| Lemure Nail | Lemurs | MAG | CON | DEX | ? | DEX | ? | CON | Resist |